Showing posts with label tutorial. Show all posts

Tuesday, 13 February 2024

Simplifying User Authentication with JWT Tokens in Node.js


In modern web development, user authentication is a fundamental aspect of building secure applications. Implementing a login and registration system using JSON Web Tokens (JWT) in Node.js offers a robust solution that enhances security and simplifies user management. In this article, we'll explore how to implement user authentication using JWT tokens in a Node.js application.


Simplifying User Authentication with JWT Tokens in Node.js

What are JWT Tokens?


JWT tokens are an open standard (RFC 7519) that defines a compact and self-contained way for securely transmitting information between parties as a JSON object. These tokens can be signed using a secret or a public/private key pair, providing a means of verifying the integrity of the information contained within.

  1. Step 1: Setting Up Your Node.js Environment
  2. Step 2: Creating the Express Server
  3. Step 3: Database Connection
  4. Step 4: Setting Up Routes
  5. Step 5: Implementing User Registration
  6. Step 6: Implementing User Login
  7. Step 7: Protecting Routes
  8. Step 8: Run Application
  9. Step 9: Conclusion

Step 1: Setting Up Your Node.js Environment


Ensure you have Node.js installed on your machine. If not, download and install it from the official Node.js website. Once installed, open your terminal and create a new directory for your project.

	
		mkdir node-jwt-auth
		cd node-jwt-auth
	

Initialize a new Node.js project and install the necessary dependencies.

	
		npm install express jsonwebtoken bcrypt body-parser mongoose
	

Step 2: Creating the Express Server


Create a file named app.js and set up a basic Express server.

app.js
	
		const express = require('express');
		const mysql = require('mysql2');
		const bcrypt = require('bcrypt');
		const jwt = require('jsonwebtoken');
		const app = express();
		const port = 3000;
		app.use(express.json());
		//Serve static files (including index.html) from the root directory
		app.use(express.static(__dirname));
	

Step 3: Database Connection


Under this app.js file we have to make MySQL Database connection. So user registration data will be stored under MySQL database.

app.js
	
		const database = mysql.createConnection({
			host : 'localhost',
			user : 'root',
			password : '123456789',
			database : 'testing'
		});

		database.connect((error)=> {
			if(error){
				console.error('Error connecting to MySQL : ', error);
			} else{
				console.log('Connected to MySQL database');
			}
		});
	

It will make database connection and also check that there is any error has been occured during database connection.

Below you can find MySQL table structure for user table. So you have to copy this .sql code and run in local MySQL database. So it will create user under which registration data will be stored.

	
		CREATE TABLE `user` (
		  `user_id` int NOT NULL AUTO_INCREMENT,
		  `user_email` varchar(70) DEFAULT NULL,
		  `user_password` varchar(70) DEFAULT NULL,
		  `user_name` varchar(45) DEFAULT NULL,
		  `email_verification_status` enum('Not Verified','Verified') DEFAULT NULL,
		  PRIMARY KEY (`user_id`)
		) ENGINE=InnoDB AUTO_INCREMENT=33 DEFAULT CHARSET=utf8mb4 COLLATE=utf8mb4_0900_ai_ci
	

Step 4: Setting Up Routes


Create routes under app.js file for handling user authentication and registration.

app.js
	
		app.get('/', (request, response)=>{
		
		});
		
		app.post('/register', async (request, response)=>{
		
		});
	

Define routes for user registration, login, and protected resources in the respective files.

Step 5: Implementing User Registration


First we have goes into '/' get route, and under this we have to write following code which will load index.html file on browser.

app.js
	
		app.get('/', (request, response)=>{
			response.sendFile(__dirname + '/index.html');
		});
	

After this, we have goes to index.html file and under this we have to create register form and then after we have to write JavaScript code for submit register form data using JavaScript fetch API. And here we have also use try catch block of handle error at front end side.

index.html
	
		<!doctype html>
		<html lang="en">
			<head>
				<!-- Required meta tags -->
				<meta charset="utf-8">
				<meta name="viewport" content="width=device-width, initial-scale=1">

				<!-- Bootstrap CSS -->
				<link href="https://cdn.jsdelivr.net/npm/bootstrap@5.0.2/dist/css/bootstrap.min.css" rel="stylesheet" integrity="sha384-EVSTQN3/azprG1Anm3QDgpJLIm9Nao0Yz1ztcQTwFspd3yD65VohhpuuCOmLASjC" crossorigin="anonymous">

				<title>Node.js Login Register using JWT Token</title>
			</head>
			<body>				
				<div class="container">
					<h1 class="text-center mb-5 mt-5">Node.js Login Register using JWT Token</h1>
					<div class="row">
						<div class="col col-4"> </div>
						<div class="col col-4">
							<span id="msgArea"></span>
							<div class="card">
								<div class="card-header">Register</div>
								<div class="card-body">
									<form id="registerForm">
										<div class="mb-3">
											<label><b>Name</b></label>
											<input type="text" name="name" id="name" class="form-control" />
										</div>
										<div class="mb-3">
											<label><b>eMail</b></label>
											<input type="text" name="email" id="email" class="form-control" />
										</div>
										<div class="mb-3">
											<label><b>Password</b></label>
											<input type="password" name="password" id="password" class="form-control" />
										</div>
										<input type="submit" class="btn btn-primary" value="Register" />
									</form>
								</div>
							</div>
						</div>
					</div>
				</div>

				<script src="https://cdn.jsdelivr.net/npm/bootstrap@5.0.2/dist/js/bootstrap.bundle.min.js" integrity="sha384-MrcW6ZMFYlzcLA8Nl+NtUVF0sA7MsXsP1UyJoMp4YLEuNSfAP+JcXn/tWtIaxVXM" crossorigin="anonymous"></script>
			</body>
		</html>

		<script>

		document.getElementById("registerForm").addEventListener('submit', async function(event){
			event.preventDefault();
			const name = document.getElementById("name").value;
			const email = document.getElementById("email").value;
			const password = document.getElementById("password").value;
			let messageArea = document.getElementById("msgArea");
			try{
				const response = await fetch('/register', {
					method : 'POST',
					headers : {
						'Content-Type': 'application/json'
					},
					body : JSON.stringify({name, email, password})
				});
				if(response.ok){
					messageArea.innerHTML = '<div class="alert alert-success">User registered successfully!</div>';
				} else {
					const data = await response.json();
					messageArea.innerHTML = `<div class="alert alert-info">Error : ${data.error}</div>`;
				}

			} catch(error){
				messageArea.innerHTML = '<div class="alert alert-danger">Internal Server Error</div>';
			}
		});

		</script>
	

Now in app.js, implement the route for user registration. Hash the user's password using bcrypt before storing it in the database and here it has also check email is already exists or not also.

app.js
	
		app.post('/register', async (request, response)=>{
			try{
				const {name, email, password} = request.body;
				if(!name || !email || !password){
					return response.status(400).json({error : 'Please provide all required fields'});
				}
				// Check if the email already exists in the database
				database.query('SELECT * FROM user WHERE user_email = ?', [email], async (error, results) =>{
					if(error){
						return response.status(500).json({error : 'Internal Server Error'});
					}
					if(results.length > 0){
						return response.status(400).json({error : 'Email already exists'});
					}
					const hashedPassword = await bcrypt.hash(password, 10);
					//Insert registeration data
					database.query('INSERT INTO user (user_email, user_password, user_name) VALUES (?, ?, ?)', [email, hashedPassword, name], (error) => {
						if(error){
							console.log(error);
							return response.status(500).json({error : 'Internal Server Error'});
						}
						return response.status(201).json({message : 'User registered successfully'});
					});
				});
			} catch(error){
				response.status(500).json({error : 'Internal Server Error'});
			}
		});
		app.listen(port, () => {
			console.log(`Server is running on http://localhost:${port}`);   
		});
	

Step 6: Implementing User Login


Now for create Login in this Node JS Application, first in app.js file we have go create route for load login form in the browser.

app.js
	
		app.get('/login', (request, response) => {
			response.sendFile(__dirname + '/login.html');
		});
	

So it will send login.html file in browser and display login login form on web page.

Next we have to create login.html file and under this file, we will write HTML code for display Login form and JavaScript code for submit login form data to server.

login.html
	
		<!doctype html>
		<html lang="en">
			<head>
				<!-- Required meta tags -->
				<meta charset="utf-8">
				<meta name="viewport" content="width=device-width, initial-scale=1">

				<!-- Bootstrap CSS -->
				<link href="https://cdn.jsdelivr.net/npm/bootstrap@5.0.2/dist/css/bootstrap.min.css" rel="stylesheet" integrity="sha384-EVSTQN3/azprG1Anm3QDgpJLIm9Nao0Yz1ztcQTwFspd3yD65VohhpuuCOmLASjC" crossorigin="anonymous">

				<title>Node.js Login Register using JWT Token</title>
			</head>
			<body>
				
				<div class="container">
					<h1 class="text-center mb-5 mt-5">Node.js Login Register using JWT Token</h1>
					<div class="row">
						<div class="col col-4"> </div>
						<div class="col col-4">
							<span id="msgArea"></span>
							<div class="card">
								<div class="card-header">Login</div>
								<div class="card-body">
									<form id="loginForm">
										<div class="mb-3">
											<label><b>eMail</b></label>
											<input type="text" name="email" id="email" class="form-control" />
										</div>
										<div class="mb-3">
											<label><b>Password</b></label>
											<input type="password" name="password" id="password" class="form-control" />
										</div>
										<input type="submit" class="btn btn-primary" value="Login" />
									</form>
								</div>
							</div>
						</div>
					</div>
				</div>

				<script src="https://cdn.jsdelivr.net/npm/bootstrap@5.0.2/dist/js/bootstrap.bundle.min.js" integrity="sha384-MrcW6ZMFYlzcLA8Nl+NtUVF0sA7MsXsP1UyJoMp4YLEuNSfAP+JcXn/tWtIaxVXM" crossorigin="anonymous"></script>
			</body>
		</html>

		<script>

		document.getElementById('loginForm').addEventListener('submit', async function(event){
			event.preventDefault();
			const email = document.getElementById('email').value;
			const password = document.getElementById('password').value;
			try {
				const response = await fetch('/login', {
					method : 'POST',
					headers : {
						'Content-Type': 'application/json',
					},
					body : JSON.stringify({ email, password })
				});
				const data = await response.json();
				if(response.ok){
					localStorage.setItem('token', data.token);
					window.location.href = '/welcome';
				} else {
					document.getElementById('msgArea').innerHTML = `<div class="alert alert-info">Error : ${data.error}</div>`;
				}
			} catch(error){
				document.getElementById('msgArea').innerHTML = '<div class="alert alert-danger">Internal Server Error</div>';
			}
		});

		</script>
	

Once login form data has been submitted then it will send login data to /login route of app.js file. And under this file it will validate user login data and here it also also compare simple login form password with hashed formatted password which is stored in database by using bcrypt library.

app.js
	
		app.post('/login', async (request, response) => {
			try {
				const {email, password} = request.body;
				if(!email || !password){
					return response.status(400).json({ error : 'Please provide all required fields'});
				}
				database.query('SELECT * FROM user WHERE user_email = ?', [email], async (error, results) => {
					if(results.length > 0){
						const user = results[0];
						if(await bcrypt.compare(password, user.user_password)){
							const token = jwt.sign({ userId : user.user_id }, secretKey, { expiresIn : '1h' });
							response.status(200).json({ token });
						} else {
							response.status(401).json({ error : 'Wrong Password' });
						}
					} else {
						response.status(401).json({ error : 'Wrong Email' });
					}
				});
			} catch(error){
				response.status(500).json({ error : 'Internal Server Error' });
			}
		});
	

Step 7: Protecting Routes


Once we have make login page, when user has been login into system then user data has been stored in JWT token. Now we want to verify that user has been login into system or not. So for this we have to make one middleware to check user is login or not. In middleware it will decode JWT token data and then after it has authenticate that user is login or not.

So for this first we have to create one button, so when we have click on that button then it will send request to Node server route for fetch data from JWT token. So when we have send request to server, then in header it will send encoded JWT token data.

welcome.html
	
		<!doctype html>
		<html lang="en">
			<head>
				<!-- Required meta tags -->
				<meta charset="utf-8">
				<meta name="viewport" content="width=device-width, initial-scale=1">

				<!-- Bootstrap CSS -->
				<link href="https://cdn.jsdelivr.net/npm/bootstrap@5.0.2/dist/css/bootstrap.min.css" rel="stylesheet" integrity="sha384-EVSTQN3/azprG1Anm3QDgpJLIm9Nao0Yz1ztcQTwFspd3yD65VohhpuuCOmLASjC" crossorigin="anonymous">

				<title>Node.js Login Register using JWT Token</title>
			</head>
			<body>
				
				<div class="container">
					<h1 class="text-center mb-5 mt-5">Node.js Login Register using JWT Token</h1>
					<div class="row">
						<div class="col col-4"> </div>
						<div class="col col-4">
							<span id="msgArea"></span>
							<div class="card">
								<div class="card-header">Welcome Page</div>
								<div class="card-body">
									<h1 class="text-center">Welcome User</h1>
									<p class="text-center">
										<button type="button" class="btn btn-warning" onclick="getJWTData()">Get User ID</button>
										<button type="button" onclick="logout()" class="btn btn-primary">Logout</button>
									</p>
								</div>
							</div>
						</div>
					</div>
				</div>

				<script src="https://cdn.jsdelivr.net/npm/bootstrap@5.0.2/dist/js/bootstrap.bundle.min.js" integrity="sha384-MrcW6ZMFYlzcLA8Nl+NtUVF0sA7MsXsP1UyJoMp4YLEuNSfAP+JcXn/tWtIaxVXM" crossorigin="anonymous"></script>
			</body>
		</html>

		<script>

		const token = localStorage.getItem('token');
		if(!token){
			window.location.href = '/login';
		}

		function logout(){
			localStorage.removeItem('token');
			window.location.href = '/login';
		}

		function getJWTData(){
			fetch('/getJWTData', {
				headers : {
					'Authorization' : token
				}
			})
			.then(response => {
				return response.json();
			})
			.then(data => {
				alert(`Login User ID is - ${data.userId}`);
			})
			.catch(error => {
				alert(error);
			});
		}

		</script>
	

Now at Node backend side code, we have to create getJWTData route and under this route we have to add verifyToken middleware. So this middleware code will be first executed and it will first receive JWT token data from HTTP header. And then after by using JWT library it will again decode that data. If data has been successfully decoded that it will execute other part of code. But Suppose there JWT token not found in HTTP headers then it will directly send error to client without executing next code. But suppose data has been decoded from JWT token then it will send back that data to client which will be pop up on web page. So this way it will fetch data from JWT token under Node JS application.

app.js
	
		// Middleware to check JWT token
		function verifyToken(request, response, next){
			const token = request.headers.authorization;
			if(!token){
				return response.status(401).json({ error : 'Access denied. No token provided.'});
			}
			try {
				const decoded = jwt.verify(token, secretKey);
				request.user = decoded;
				next();
			} catch(error){
				response.status(401).json({ error : 'Invalid token' });
			}
		}

		app.get('/getJWTData', verifyToken, (request, response) => {
			response.status(200).json({ userId : request.user.userId });
		});
	

Step 8: Run Application


Once our code is ready, now for check output in browser, we have goes to terminal and run node app.js command which will start node server.

And in browser we can open this Node application by open http://localhost:3000 this url.

Step 9: Conclusion


You've successfully implemented a login and registration system using JWT tokens in your Node.js application. This provides a secure way to manage user sessions and protect sensitive resources. With the flexibility of Node.js and the simplicity of JWT tokens, you can now build robust authentication systems for your web applications.

Complete Source Code


app.js
	
		const express = require('express');
		const mysql = require('mysql2');
		const bcrypt = require('bcrypt');
		const jwt = require('jsonwebtoken');
		const app = express();
		const port = 3000;
		app.use(express.json());
		//Serve static files (including index.html) from the root directory
		app.use(express.static(__dirname));
		const database = mysql.createConnection({
			host : 'localhost',
			user : 'root',
			password : '123456789',
			database : 'testing'
		});

		database.connect((error)=> {
			if(error){
				console.error('Error connecting to MySQL : ', error);
			} else{
				console.log('Connected to MySQL database');
			}
		});

		const secretKey = 'eyJhbGciOiJIUzI1NiJ9.eyJSb2xlIjoiQWRtaW4iLCJJc3N1ZXIiOiJJc3N1ZXIiLCJVc2VybmFtZSI6IkphdmFJblVzZSIsImV4cCI6MTcwNjg3ODE1MywiaWF0IjoxNzA2ODc4MTUzfQ.i4j208HUwM7JjLJL98o9EkE68Ia87i694iq7r67zRHM';

		app.get('/', (request, response)=>{
			response.sendFile(__dirname + '/index.html');
		});

		app.post('/register', async (request, response)=>{
			try{
				const {name, email, password} = request.body;
				if(!name || !email || !password){
					return response.status(400).json({error : 'Please provide all required fields'});
				}
				// Check if the email already exists in the database
				database.query('SELECT * FROM user WHERE user_email = ?', [email], async (error, results) =>{
					if(error){
						return response.status(500).json({error : 'Internal Server Error'});
					}
					if(results.length > 0){
						return response.status(400).json({error : 'Email already exists'});
					}
					const hashedPassword = await bcrypt.hash(password, 10);
					//Insert registeration data
					database.query('INSERT INTO user (user_email, user_password, user_name) VALUES (?, ?, ?)', [email, hashedPassword, name], (error) => {
						if(error){
							console.log(error);
							return response.status(500).json({error : 'Internal Server Error'});
						}
						return response.status(201).json({message : 'User registered successfully'});
					});
				});
			} catch(error){
				response.status(500).json({error : 'Internal Server Error'});
			}
		});

		app.get('/login', (request, response) => {
			response.sendFile(__dirname + '/login.html');
		});

		app.post('/login', async (request, response) => {
			try {
				const {email, password} = request.body;
				if(!email || !password){
					return response.status(400).json({ error : 'Please provide all required fields'});
				}
				database.query('SELECT * FROM user WHERE user_email = ?', [email], async (error, results) => {
					if(results.length > 0){
						const user = results[0];
						if(await bcrypt.compare(password, user.user_password)){
							const token = jwt.sign({ userId : user.user_id }, secretKey, { expiresIn : '1h' });
							response.status(200).json({ token });
						} else {
							response.status(401).json({ error : 'Wrong Password' });
						}
					} else {
						response.status(401).json({ error : 'Wrong Email' });
					}
				});
			} catch(error){
				response.status(500).json({ error : 'Internal Server Error' });
			}
		});

		app.get('/welcome', (request, response) => {
			response.sendFile(__dirname + '/welcome.html');
		});

		// Middleware to check JWT token
		function verifyToken(request, response, next){
			const token = request.headers.authorization;
			if(!token){
				return response.status(401).json({ error : 'Access denied. No token provided.'});
			}
			try {
				const decoded = jwt.verify(token, secretKey);
				request.user = decoded;
				next();
			} catch(error){
				response.status(401).json({ error : 'Invalid token' });
			}
		}

		app.get('/getJWTData', verifyToken, (request, response) => {
			response.status(200).json({ userId : request.user.userId });
		});


		app.listen(port, () => {
			console.log(`Server is running on http://localhost:${port}`);   
		});
	

index.html
	
		<!doctype html>
		<html lang="en">
			<head>
				<!-- Required meta tags -->
				<meta charset="utf-8">
				<meta name="viewport" content="width=device-width, initial-scale=1">

				<!-- Bootstrap CSS -->
				<link href="https://cdn.jsdelivr.net/npm/bootstrap@5.0.2/dist/css/bootstrap.min.css" rel="stylesheet" integrity="sha384-EVSTQN3/azprG1Anm3QDgpJLIm9Nao0Yz1ztcQTwFspd3yD65VohhpuuCOmLASjC" crossorigin="anonymous">

				<title>Node.js Login Register using JWT Token</title>
			</head>
			<body>
				
				<div class="container">
					<h1 class="text-center mb-5 mt-5">Node.js Login Register using JWT Token</h1>
					<div class="row">
						<div class="col col-4"> </div>
						<div class="col col-4">
							<span id="msgArea"></span>
							<div class="card">
								<div class="card-header">Register</div>
								<div class="card-body">
									<form id="registerForm">
										<div class="mb-3">
											<label><b>Name</b></label>
											<input type="text" name="name" id="name" class="form-control" />
										</div>
										<div class="mb-3">
											<label><b>eMail</b></label>
											<input type="text" name="email" id="email" class="form-control" />
										</div>
										<div class="mb-3">
											<label><b>Password</b></label>
											<input type="password" name="password" id="password" class="form-control" />
										</div>
										<input type="submit" class="btn btn-primary" value="Register" />
									</form>
								</div>
							</div>
						</div>
					</div>
				</div>

				<script src="https://cdn.jsdelivr.net/npm/bootstrap@5.0.2/dist/js/bootstrap.bundle.min.js" integrity="sha384-MrcW6ZMFYlzcLA8Nl+NtUVF0sA7MsXsP1UyJoMp4YLEuNSfAP+JcXn/tWtIaxVXM" crossorigin="anonymous"></script>
			</body>
		</html>

		<script>

		document.getElementById("registerForm").addEventListener('submit', async function(event){
			event.preventDefault();
			const name = document.getElementById("name").value;
			const email = document.getElementById("email").value;
			const password = document.getElementById("password").value;
			let messageArea = document.getElementById("msgArea");
			try{
				const response = await fetch('/register', {
					method : 'POST',
					headers : {
						'Content-Type': 'application/json'
					},
					body : JSON.stringify({name, email, password})
				});
				if(response.ok){
					messageArea.innerHTML = '<div class="alert alert-success">User registered successfully!</div>';
				} else {
					const data = await response.json();
					messageArea.innerHTML = `<div class="alert alert-info">Error : ${data.error}</div>`;
				}

			} catch(error){
				messageArea.innerHTML = '<div class="alert alert-danger">Internal Server Error</div>';
			}
		});

		</script>
	

login.html
	
		<!doctype html>
		<html lang="en">
			<head>
				<!-- Required meta tags -->
				<meta charset="utf-8">
				<meta name="viewport" content="width=device-width, initial-scale=1">

				<!-- Bootstrap CSS -->
				<link href="https://cdn.jsdelivr.net/npm/bootstrap@5.0.2/dist/css/bootstrap.min.css" rel="stylesheet" integrity="sha384-EVSTQN3/azprG1Anm3QDgpJLIm9Nao0Yz1ztcQTwFspd3yD65VohhpuuCOmLASjC" crossorigin="anonymous">

				<title>Node.js Login Register using JWT Token</title>
			</head>
			<body>
				
				<div class="container">
					<h1 class="text-center mb-5 mt-5">Node.js Login Register using JWT Token</h1>
					<div class="row">
						<div class="col col-4"> </div>
						<div class="col col-4">
							<span id="msgArea"></span>
							<div class="card">
								<div class="card-header">Login</div>
								<div class="card-body">
									<form id="loginForm">
										<div class="mb-3">
											<label><b>eMail</b></label>
											<input type="text" name="email" id="email" class="form-control" />
										</div>
										<div class="mb-3">
											<label><b>Password</b></label>
											<input type="password" name="password" id="password" class="form-control" />
										</div>
										<input type="submit" class="btn btn-primary" value="Login" />
									</form>
								</div>
							</div>
						</div>
					</div>
				</div>

				<script src="https://cdn.jsdelivr.net/npm/bootstrap@5.0.2/dist/js/bootstrap.bundle.min.js" integrity="sha384-MrcW6ZMFYlzcLA8Nl+NtUVF0sA7MsXsP1UyJoMp4YLEuNSfAP+JcXn/tWtIaxVXM" crossorigin="anonymous"></script>
			</body>
		</html>

		<script>

		document.getElementById('loginForm').addEventListener('submit', async function(event){
			event.preventDefault();
			const email = document.getElementById('email').value;
			const password = document.getElementById('password').value;
			try {
				const response = await fetch('/login', {
					method : 'POST',
					headers : {
						'Content-Type': 'application/json',
					},
					body : JSON.stringify({ email, password })
				});
				const data = await response.json();
				if(response.ok){
					localStorage.setItem('token', data.token);
					window.location.href = '/welcome';
				} else {
					document.getElementById('msgArea').innerHTML = `<div class="alert alert-info">Error : ${data.error}</div>`;
				}
			} catch(error){
				document.getElementById('msgArea').innerHTML = '<div class="alert alert-danger">Internal Server Error</div>';
			}
		});

		</script>
	

welcome.html
	
		<!doctype html>
		<html lang="en">
			<head>
				<!-- Required meta tags -->
				<meta charset="utf-8">
				<meta name="viewport" content="width=device-width, initial-scale=1">

				<!-- Bootstrap CSS -->
				<link href="https://cdn.jsdelivr.net/npm/bootstrap@5.0.2/dist/css/bootstrap.min.css" rel="stylesheet" integrity="sha384-EVSTQN3/azprG1Anm3QDgpJLIm9Nao0Yz1ztcQTwFspd3yD65VohhpuuCOmLASjC" crossorigin="anonymous">

				<title>Node.js Login Register using JWT Token</title>
			</head>
			<body>
				
				<div class="container">
					<h1 class="text-center mb-5 mt-5">Node.js Login Register using JWT Token</h1>
					<div class="row">
						<div class="col col-4"> </div>
						<div class="col col-4">
							<span id="msgArea"></span>
							<div class="card">
								<div class="card-header">Welcome Page</div>
								<div class="card-body">
									<h1 class="text-center">Welcome User</h1>
									<p class="text-center">
										<button type="button" class="btn btn-warning" onclick="getJWTData()">Get User ID</button>
										<button type="button" onclick="logout()" class="btn btn-primary">Logout</button>
									</p>
								</div>
							</div>
						</div>
					</div>
				</div>

				<script src="https://cdn.jsdelivr.net/npm/bootstrap@5.0.2/dist/js/bootstrap.bundle.min.js" integrity="sha384-MrcW6ZMFYlzcLA8Nl+NtUVF0sA7MsXsP1UyJoMp4YLEuNSfAP+JcXn/tWtIaxVXM" crossorigin="anonymous"></script>
			</body>
		</html>

		<script>

		const token = localStorage.getItem('token');
		if(!token){
			window.location.href = '/login';
		}

		function logout(){
			localStorage.removeItem('token');
			window.location.href = '/login';
		}

		function getJWTData(){
			fetch('/getJWTData', {
				headers : {
					'Authorization' : token
				}
			})
			.then(response => {
				return response.json();
			})
			.then(data => {
				alert(`Login User ID is - ${data.userId}`);
			})
			.catch(error => {
				alert(error);
			});
		}

		</script>


Saturday, 7 October 2023

A Comprehensive Guide to Resetting the Root Password in MySQL 8.0

A Comprehensive Guide to Resetting the Root Password in MySQL 8.0


In the unfortunate event of forgetting or misplacing your MySQL root password, it becomes crucial to regain access to your database. The root password is securely stored in the users table, necessitating a method to bypass MySQL authentication and update the password record.

Fortunately, there's a straightforward solution, and this tutorial will walk you through the process of recovering or resetting the root password in MySQL 8.0.

As per the official MySQL documentation, there are two primary methods to reset the root MySQL password, both of which we will cover in detail.

Method 1: Reset MySQL Root Password Using --init-file


One approach to reset the root password involves creating a local file and initiating the MySQL service with the --init-file option. Follow these steps:

1. Create a file, for example, /home/user/init-file.txt, and ensure it's readable by the MySQL user.

2. Within the file, insert the following command, replacing 'new_password' with your desired password:


ALTER USER 'root'@'localhost' IDENTIFIED BY 'new_password';


3. Stop the MySQL service:


# systemctl stop mysqld.service     # for systems using systemd 
# /etc/init.d/mysqld stop           # for systems using init


4. Start the MySQL service with the following command:


# mysqld --user=mysql --init-file=/home/user/init-file.txt --console


5. The MySQL service will start, and the init-file you created will execute, updating the root user's password. Be sure to delete the file once the password has been reset.

6. Stop the server and restart it normally:


# systemctl stop mysqld.service        # for systems using systemd 
# systemctl restart mysqld.service     # for systems using systemd 

# /etc/init.d/mysqld stop              # for systems using init
# /etc/init.d/mysqld restart           # for systems using init


You should now be able to connect to the MySQL server as root using the new password:


# mysql -u root -p


Method 2: Reset MySQL Root Password Using --skip-grant-tables


The second method involves starting the MySQL service with the --skip-grant-tables option. This approach is less secure, as it allows all users to connect without a password while the service is running in this mode. However, it can be useful in certain situations. Follow these steps:

1. Ensure the MySQL service is stopped:


# systemctl stop mysqld.service     # for systems using systemd 
# /etc/init.d/mysqld stop           # for systems using init


2. Start the MySQL service with the --skip-grant-tables option:


# mysqld --skip-grant-tables --user=mysql &


3. Connect to the MySQL server:


# mysql


4. Since account management is disabled with --skip-grant-tables, you must reload the privileges:


# FLUSH PRIVILEGES;


5. Update the root password with the following command, replacing 'new_password' with your desired password:


# ALTER USER 'root'@'localhost' IDENTIFIED BY 'new_password';


6. Stop the MySQL server and start it normally:


# systemctl stop mysqld.service        # for systems using systemd 
# systemctl restart mysqld.service     # for systems using systemd 

# /etc/init.d/mysqld stop              # for systems using init
# /etc/init.d/mysqld restart           # for systems using init


You should now be able to connect with your new password:


# mysql -u root -p


Conclusion


In this comprehensive guide, you've learned how to reset the root password for your MySQL 8.0 server. We hope this step-by-step process has made it easy for you to regain control of your database.

Friday, 1 September 2023

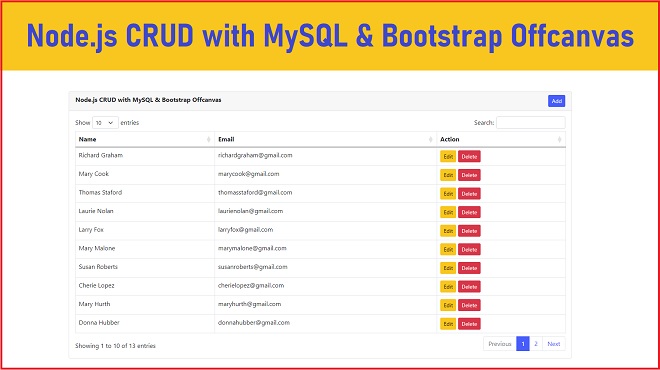
Efficient Node.js CRUD App with MySQL: Enhanced by Bootstrap Offcanvas for a Seamless User Experience

Efficient Node.js CRUD App with MySQL: Enhanced by Bootstrap Offcanvas for a Seamless User Experience


In today's fast-paced world of web development, creating applications that can seamlessly manage data is a must. That's where CRUD (Create, Read, Update, Delete) applications come into play, enabling users to interact with data stored in databases efficiently. In this article, we'll guide you through building an efficient Node.js CRUD application, supercharged by MySQL as the database, and enhanced with Bootstrap Offcanvas for an exceptional user experience.

Getting Started with Node.js and MySQL


Before diving into the Offcanvas enhancements, let's set the foundation by creating a basic Node.js CRUD application with MySQL. We'll go step by step:

Step 1: Setting Up Your Development Environment


Make sure you have Node.js and MySQL installed on your system. If not, you can download and install them from their respective websites.

Step 2: Project Initialization


Create a new directory for your project and navigate to it in your terminal. Run the following command to initialize a Node.js project:


npm init -y

Step 3: Installing Dependencies


Install the necessary dependencies: express, mysql2, and body-parser using the following command:


npm install express mysql2 body-parser


Step 4: Creating the Server


Now, create a server.js file and set up your Express server. Import the required modules and configure your server:


const express = require('express');

const bodyParser = require('body-parser');

const mysql = require('mysql2');

const app = express();

app.use(bodyParser.urlencoded({ extended : true }));

const connection = mysql.createConnection({
	host : 'localhost',
	user : 'root',
	password : '',
	database : 'testing'
});

connection.connect((error) => {
	if(error){
		console.log('Error connecting to MySQL:', err);
		return;
	}
	console.log('Connected to MySQL database');
});

app.listen(3000, () => {
	console.log('Server is listening on port 3000');
});


Step 5: Setting Up CRUD Routes


Implement your CRUD operations by defining routes for creating, reading, updating, and deleting data in your MySQL database. Here's a simplified example for the "read" operation:

Index Route

When someone navigates to the root URL of our server, we serve an HTML file named form.html. We're essentially setting up the initial interface for users to interact with.


app.get('/', (request, response) => {
	response.sendFile(__dirname + '/form.html');
});


Select or Fetch Data


This route will handle requests for fetching data from our MySQL database.


app.get('/fetchData', (request, response) => {
	const { draw, start, length, order, columns, search } = request.query;

	const column_index = order && order[0] && order[0].column;

	const column_sort_order = order === undefined ? 'desc' : request.query.order[0]['dir'];

	const column_name = column_index ? columns[column_index] : 'id';

	const search_value = search.value;

	const search_query = search_value ? ` WHERE name LIKE '%${search_value}%' OR email LIKE '%${search_value}%'` : '';

	const query1 = `SELECT id, name, email FROM user ${search_query} ORDER BY ${column_name} ${column_sort_order} LIMIT ${start}, ${length}`;

	const query2 = `SELECT COUNT(*) AS Total FROM user`;

	const query3 = `SELECT COUNT(*) AS Total FROM user ${search_query}`;

	connection.query(query1, (dataError, dataResult) => {

		connection.query(query2, (totalDataError, totalDataResult) => {

			connection.query(query3, (totalFilterDataError, totalFilterDataResult) => {

				response.json({
					draw : request.query.draw,
					recordsTotal : totalDataResult[0]['Total'],
					recordsFiltered : totalFilterDataResult[0]['Total'],
					data : dataResult
				});

			})

		})

	})
});


Insert Update Delete Data


This route will handle requests for Insert Update Delete data from our MySQL database.


app.post('/submitData', (request, response) => {
	const id = request.body.id;
	const name = request.body.name;
	const email = request.body.email;
	const action = request.body.action;
	let query;
	let data;
	let message;
	if(action === 'Insert'){
		query = `INSERT INTO user (name, email) VALUES (?, ?)`;
		data = [name, email];
		message = 'Data has been inserted';
	}

	if(action === 'Edit'){
		query = `UPDATE user SET name = ?, email = ? WHERE id = ?`;
		data = [name, email, id];
		message = 'Data has been updated';
	}

	if(action === 'Delete'){
		query = `DELETE FROM user WHERE id = ?`;
		data = [id];
		message = 'Data has been deleted';
	}

	connection.query(query, data, (error, result) => {
		response.json({'message' : message});
	});
});


Fetch Single Data


This route will be used for fetch single data from MySQL Database.


app.get('/fetchData/:id', (request, response) => {
	const query = `SELECT * FROM user WHERE id = ?`;

	connection.query(query, [request.params.id], (error, result) => {
		response.json(result[0]);
	});
});


Enhancing User Experience with Bootstrap Offcanvas


Now that we have our Node.js CRUD application up and running, it's time to enhance the user experience with Bootstrap Offcanvas. The Offcanvas component provides a sleek and non-intrusive way to interact with data.

Step 1: Adding Bootstrap to Your Project


Include Bootstrap CSS and JavaScript files in your HTML. You can either download them and host them locally or use a Content Delivery Network (CDN). Here's an example of using CDN links:


<!doctype html>
<html lang="en">
    <head>
        <!-- Required meta tags -->
        <meta charset="utf-8">
        <meta name="viewport" content="width=device-width, initial-scale=1">

        <!-- Bootstrap CSS -->
        <link href="https://cdn.jsdelivr.net/npm/bootstrap@5.0.2/dist/css/bootstrap.min.css" rel="stylesheet" integrity="sha384-EVSTQN3/azprG1Anm3QDgpJLIm9Nao0Yz1ztcQTwFspd3yD65VohhpuuCOmLASjC" crossorigin="anonymous">
        <link href="https://cdn.datatables.net/1.13.6/css/dataTables.bootstrap5.min.css" rel="stylesheet">

        <title>Node.js CRUD with MySQL & Bootstrap Offcanvas</title>
    </head>
    <body>

        <script src="https://code.jquery.com/jquery-3.7.0.js"></script>
        <script src="https://cdn.jsdelivr.net/npm/bootstrap@5.0.2/dist/js/bootstrap.bundle.min.js" integrity="sha384-MrcW6ZMFYlzcLA8Nl+NtUVF0sA7MsXsP1UyJoMp4YLEuNSfAP+JcXn/tWtIaxVXM" crossorigin="anonymous"></script>
        <script src="https://cdn.datatables.net/1.13.6/js/jquery.dataTables.min.js"></script>
        <script src="https://cdn.datatables.net/1.13.6/js/dataTables.bootstrap5.min.js"></script>

    </body>
</html>


Step 2: Creating an Offcanvas


Now, let's implement an Offcanvas for editing user data. Add a button to trigger the Offcanvas:


<button type="button" class="btn btn-primary btn-sm float-end" onclick="addData()">Add</button>


Create the Offcanvas element with a form for editing user data:


<div class="offcanvas offcanvas-end" tabindex="-1" id="offcanvas_component">
            <div class="offcanvas-header">
                <h5 class="offcanvas-title" id="offcanvasLabel">Add Data</h5>
                <button type="button" class="btn-close" data-bs-dismiss="offcanvas" aria-label="Close"></button>
            </div>
            <div class="offcanvas-body">

            </div>
        </div>


Step 3: Implementing the Edit Form


Inside the Offcanvas body, add a form for adding or editing user data. So for this, we have make form field by using javascript function which we can you for both Insert or updata of data also.


function makeForm(id = '', name = '', email = '', action = 'Insert')
    {
        const output = `
        <div class="mb-3">
            <label for="name">Name:</label>
            <input type="text" name="name" id="name" class="form-control" value="${name}" />
        </div>
        <div class="mb-3">
            <label for="email">Email:</label>
            <input type="email" name="email" id="email" class="form-control" value="${email}" />
        </div>
        <input type="hidden" name="action" id="action" value="${action}" />
        <input type="hidden" name="id" id="id" value="${id}" />
        <input type="submit" class="btn btn-primary" onclick="submitForm();" value="${action}" />
        `;
        return output;
    }


Step 4: JavaScript for Offcanvas Interaction


Finally, use JavaScript to handle the Offcanvas interactions. Add an event listener to open the Offcanvas when the "Edit User" button is clicked:


let offcanvas;

    let offcanvas_body = document.querySelector('.offcanvas-body');

    let offcanvas_component = document.querySelector('#offcanvas_component');

    let offcanvasLabel = document.querySelector('#offcanvasLabel');

    offcanvas = new bootstrap.Offcanvas(offcanvas_component);


You can further enhance this by pre-populating the form with user data for editing and implementing the update functionality.

Complete Source Code


server.js

const express = require('express');

const bodyParser = require('body-parser');

const mysql = require('mysql2');

const app = express();

app.use(bodyParser.urlencoded({ extended : true }));

const connection = mysql.createConnection({
	host : 'localhost',
	user : 'root',
	password : '',
	database : 'testing'
});

connection.connect((error) => {
	if(error){
		console.log('Error connecting to MySQL:', err);
		return;
	}
	console.log('Connected to MySQL database');
});

app.get('/', (request, response) => {
	response.sendFile(__dirname + '/form.html');
});

app.get('/fetchData', (request, response) => {
	const { draw, start, length, order, columns, search } = request.query;

	const column_index = order && order[0] && order[0].column;

	const column_sort_order = order === undefined ? 'desc' : request.query.order[0]['dir'];

	const column_name = column_index ? columns[column_index] : 'id';

	const search_value = search.value;

	const search_query = search_value ? ` WHERE name LIKE '%${search_value}%' OR email LIKE '%${search_value}%'` : '';

	const query1 = `SELECT id, name, email FROM user ${search_query} ORDER BY ${column_name} ${column_sort_order} LIMIT ${start}, ${length}`;

	const query2 = `SELECT COUNT(*) AS Total FROM user`;

	const query3 = `SELECT COUNT(*) AS Total FROM user ${search_query}`;

	connection.query(query1, (dataError, dataResult) => {

		connection.query(query2, (totalDataError, totalDataResult) => {

			connection.query(query3, (totalFilterDataError, totalFilterDataResult) => {

				response.json({
					draw : request.query.draw,
					recordsTotal : totalDataResult[0]['Total'],
					recordsFiltered : totalFilterDataResult[0]['Total'],
					data : dataResult
				});

			})

		})

	})
});

app.post('/submitData', (request, response) => {
	const id = request.body.id;
	const name = request.body.name;
	const email = request.body.email;
	const action = request.body.action;
	let query;
	let data;
	let message;
	if(action === 'Insert'){
		query = `INSERT INTO user (name, email) VALUES (?, ?)`;
		data = [name, email];
		message = 'Data has been inserted';
	}

	if(action === 'Edit'){
		query = `UPDATE user SET name = ?, email = ? WHERE id = ?`;
		data = [name, email, id];
		message = 'Data has been updated';
	}

	if(action === 'Delete'){
		query = `DELETE FROM user WHERE id = ?`;
		data = [id];
		message = 'Data has been deleted';
	}

	connection.query(query, data, (error, result) => {
		response.json({'message' : message});
	});
});

app.get('/fetchData/:id', (request, response) => {
	const query = `SELECT * FROM user WHERE id = ?`;

	connection.query(query, [request.params.id], (error, result) => {
		response.json(result[0]);
	});
});

app.listen(3000, () => {
	console.log('Server is listening on port 3000');
});


form.html

<!doctype html>
<html lang="en">
    <head>
        <!-- Required meta tags -->
        <meta charset="utf-8">
        <meta name="viewport" content="width=device-width, initial-scale=1">

        <!-- Bootstrap CSS -->
        <link href="https://cdn.jsdelivr.net/npm/bootstrap@5.0.2/dist/css/bootstrap.min.css" rel="stylesheet" integrity="sha384-EVSTQN3/azprG1Anm3QDgpJLIm9Nao0Yz1ztcQTwFspd3yD65VohhpuuCOmLASjC" crossorigin="anonymous">
        <link href="https://cdn.datatables.net/1.13.6/css/dataTables.bootstrap5.min.css" rel="stylesheet">

        <title>Node.js CRUD with MySQL & Bootstrap Offcanvas</title>
    </head>
    <body>
        <div class="container">
            <h1 class="text-danger text-center mt-3"><b>Node.js CRUD with MySQL & Bootstrap Offcanvas - Delete Data</b></h1>
            <div class="card mt-5">
                <div class="card-header">
                    <div class="row">
                        <div class="col-md-11"><b>Node.js CRUD with MySQL & Bootstrap Offcanvas</b></div>
                        <div class="col-md-1">
                            <button type="button" class="btn btn-primary btn-sm float-end" onclick="addData()">Add</button>
                        </div>
                    </div>
                </div>
                <div class="card-body">
                    <div class="table-responsive">
                        <table class="table table-bordered" id="sample_data">
                            <thead>
                                <tr>
                                    <th>Name</th>
                                    <th>Email</th>
                                    <th>Action</th>
                                </tr>
                            </thead>
                            <tbody></tbody>
                        </table>
                    </div>
                </div>
            </div>
        </div>

        <div class="offcanvas offcanvas-end" tabindex="-1" id="offcanvas_component">
            <div class="offcanvas-header">
                <h5 class="offcanvas-title" id="offcanvasLabel">Add Data</h5>
                <button type="button" class="btn-close" data-bs-dismiss="offcanvas" aria-label="Close"></button>
            </div>
            <div class="offcanvas-body">

            </div>
        </div>

        <!-- Optional JavaScript; choose one of the two! -->

        <!-- Option 1: Bootstrap Bundle with Popper -->


        <script src="https://code.jquery.com/jquery-3.7.0.js"></script>
        <script src="https://cdn.jsdelivr.net/npm/bootstrap@5.0.2/dist/js/bootstrap.bundle.min.js" integrity="sha384-MrcW6ZMFYlzcLA8Nl+NtUVF0sA7MsXsP1UyJoMp4YLEuNSfAP+JcXn/tWtIaxVXM" crossorigin="anonymous"></script>
        <script src="https://cdn.datatables.net/1.13.6/js/jquery.dataTables.min.js"></script>
        <script src="https://cdn.datatables.net/1.13.6/js/dataTables.bootstrap5.min.js"></script>

    </body>
</html>

<script>

$(document).ready(function(){

    $('#sample_data').DataTable({
        ajax : '/fetchData',
        processing : true,
        serverSide : true,
        serverMethod : 'GET',
        order : [],
        columns : [
            { data : 'name' },
            { data : 'email' },
            {
                data : null,
                render : function (data, type, row){
                    return `<button class="btn btn-warning btn-sm" onclick="fetchData(${data.id})">Edit</button>&nbsp;<button class="btn btn-danger btn-sm" onclick="deleteData(${data.id})">Delete</button>`;
                }
            }
        ]
    });

});

    let offcanvas;

    let offcanvas_body = document.querySelector('.offcanvas-body');

    let offcanvas_component = document.querySelector('#offcanvas_component');

    let offcanvasLabel = document.querySelector('#offcanvasLabel');

    offcanvas = new bootstrap.Offcanvas(offcanvas_component);

    function addData()
    {
        offcanvas_body.innerHTML = makeForm();
        offcanvas.show();
    }

    function makeForm(id = '', name = '', email = '', action = 'Insert')
    {
        const output = `
        <div class="mb-3">
            <label for="name">Name:</label>
            <input type="text" name="name" id="name" class="form-control" value="${name}" />
        </div>
        <div class="mb-3">
            <label for="email">Email:</label>
            <input type="email" name="email" id="email" class="form-control" value="${email}" />
        </div>
        <input type="hidden" name="action" id="action" value="${action}" />
        <input type="hidden" name="id" id="id" value="${id}" />
        <input type="submit" class="btn btn-primary" onclick="submitForm();" value="${action}" />
        `;
        return output;
    }

    function submitForm()
    {
        const id = document.querySelector('#id').value;
        const name = document.querySelector('#name').value;
        const email = document.querySelector('#email').value;
        const action = document.querySelector('#action').value;

        $.ajax({
            url : '/submitData',
            method : 'POST',
            data : {id : id, name : name, email : email, action : action},
            dataType : 'JSON',
            success : function(data){
                $('#sample_data').DataTable().ajax.reload();
                offcanvas.hide();
                alert(data.message);
            }
        });
    }

    function fetchData(id)
    {
        $.ajax({
            url : '/fetchData/'+id,
            dataType : 'JSON',
            success : function(data){
                offcanvas_body.innerHTML = makeForm(data.id, data.name, data.email, 'Edit');
                offcanvasLabel.innerHTML = 'Edit Data';
                offcanvas.show();
            }
        });
    }

    function deleteData(id){
        let output = `
        <div class="text-center">
            <h3 class="text-danger mb-4">Are you sure you want to remove this data?</h3>
            <input type="hidden" id="id" value="${id}" />
            <input type="hidden" id="action" value="Delete" />
            <input type="hidden" id="name" value="" />
            <input type="hidden" id="email" value="" />
            <button type="button" class="btn btn-info" onclick="submitForm()">OK</button>
            <button type="button" class="btn btn-default" data-bs-dismiss="offcanvas">Cancel</button>
        </div>
        `;

        offcanvas_body.innerHTML = output;
        offcanvasLabel.innerHTML = 'Delete Data Confirmation';
        offcanvas.show();
    }

</script>


Run Node Application


For run Node.js Application, we have goes to terminal and goes into our working directory and run following command.


node server.js


This command will start our Node server and for check output in browser, we have to open this url in the browser window.


http://localhost:3000/


Conclusion


In this article, we've walked through the process of building an efficient Node.js CRUD application with MySQL. We've also explored how to enhance the user experience by integrating Bootstrap Offcanvas for a seamless and visually appealing interface. By combining the power of Node.js, MySQL, and Bootstrap Offcanvas, you can create dynamic and user-friendly applications that excel in data management.

Now, it's your turn to explore and expand upon these concepts to build feature-rich CRUD applications tailored to your specific requirements. Happy coding!

Friday, 18 August 2023

How to convert Array to String in Node.js

Arrays are fundamental data structures in programming that allow you to store multiple values in a single variable. In Node.js, you might often come across situations where you need to convert an array into a string. Fortunately, there are several methods you can use to achieve this, each catering to different needs. In this article, we'll explore various techniques to convert an array to a string in Node.js.

How to convert Array to String in Node.js


Method 1: Using Array.prototype.join()


The join() method is a simple and effective way to concatenate the elements of an array into a string using a specified separator. Here's how you can use it:


const fruits = ['apple', 'banana', 'orange'];

const result = fruits.join(', '); // Join array elements with a comma and space

console.log(result); // Output: "apple, banana, orange"


Method 2: Using toString()


JavaScript arrays inherit a default toString() method that converts an array to a string by joining the elements with commas. You can directly use this method on an array:


const fruits = ['apple', 'banana', 'orange'];
const result = fruits.toString();
console.log(result); // Output: "apple,banana,orange"


Method 3: Using JSON.stringify()


When dealing with complex arrays or objects, using JSON.stringify() can be incredibly helpful. This method converts an array to a JSON-formatted string:


const fruits = ['apple', 'banana', 'orange'];
const jsonString = JSON.stringify(fruits);
console.log(jsonString); // Output: '["apple","banana","orange"]'


Method 4: Using Custom Formatting


For greater control over the output format, you can use methods like map() and join() together to apply custom formatting to array elements:


const fruits = ['apple', 'banana', 'orange'];
const formattedString = fruits.map(item => item.toUpperCase()).join(' | ');
console.log(formattedString); // Output: "APPLE | BANANA | ORANGE"


Conclusion


Converting an array to a string in Node.js is a common task with various approaches. Depending on your requirements, you can choose the method that best suits your needs. The join() method is simple and effective, while toString() offers a quick way to concatenate elements. If you're dealing with more complex data, JSON.stringify() can be invaluable. Lastly, custom formatting with map() and join() provides flexibility for specific output formats.

Remember to consider your use case and the desired format of the output when choosing the appropriate method for converting arrays to strings in your Node.js applications.

Happy coding!

Monday, 19 June 2023

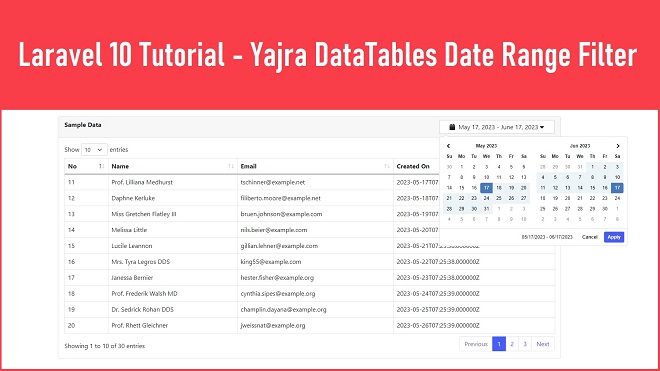
Laravel 10 Tutorial: Ajax-based Date Range Filtering with Yajra DataTables

Introduction


In this Laravel 10 tutorial, we will explore how to implement an Ajax-based date range filtering feature using Yajra DataTables. Yajra DataTables is a powerful jQuery plugin that simplifies working with dynamic, interactive tables in Laravel applications. By combining it with Ajax and date range filtering, we can create a responsive and user-friendly data filtering mechanism.


Laravel 10 Tutorial: Ajax-based Date Range Filtering with Yajra DataTables


Below you can find step by step guide for implementing Ajax Date Range Filter in Laravel 10 Yajra DataTables.

  1. Download Laravel
  2. Install Yajra Datatable
  3. Make MySQL Database Connection
  4. Insert Sample Users Data
  5. Create Controller
  6. Create Views Blade File
  7. Set Route
  8. Run Laravel App

1 - Download Laravel


Before we begin, make sure you have Laravel 10 installed on your local or remote development environment. If you haven't installed it yet, so for install Laravel 10 framework, we have goes into directory where we want to download Laravel 10 Application and after this goes into terminal and run following command.


composer create-project laravel/laravel date_range_filter


This command will create date_range_filter and under this directory it will download Laravel 10 Application. And after this we have go navigate to this directory by run following command.


cd date_range_filter


2 - Install Yajra Datatable


To use Yajra DataTables in your Laravel project, you need to install the package. Open your terminal and navigate to your project's directory. Then, run the following command:


composer require yajra/laravel-datatables-oracle


This will install the Yajra DataTables package and its dependencies.

3 - Make MySQL Database Connection


Next we have to connect Laravel Application with MySQL database. So for this we have to open .env file and define following MySQL configuration for make MySQL database connection.


DB_CONNECTION=mysql
DB_HOST=127.0.0.1
DB_PORT=3306
DB_DATABASE=testing
DB_USERNAME=root
DB_PASSWORD=


So this command will make MySQL database with Laravel application. Next we have to make users table in MySQL database. So we have goes to terminal and run following command:


php artisan migrate


So this command will make necessary table in MySQL database with also create users table also.

4 - Insert Sample Users Data


For demonstration purposes, let's add some sample users data into users table. So we have goes to terminal and run following command:


php artisan tinker


This command will enable for write PHP code under terminal and for insert sample data in users table we have to write following code in terminal which will insert 40 users data into users table.


User::factory()->count(40)->create()


5 - Create Controller


Now, let's create a controller that will handle the data retrieval and filtering logic. In your terminal, run the following command to generate a new controller:


php artisan make:controller UserController


Open the app/Http/Controllers/UserController.php file and replace the index() method with the following code:

app/Http/Controllers/UserController.php

<?php

namespace App\Http\Controllers;

use Illuminate\Http\Request;

use App\Models\User;

use DataTables;

class UserController extends Controller
{
    public function index(Request $request)
    {
        if($request->ajax())
        {
            $data = User::select('*');

            if($request->filled('from_date') && $request->filled('to_date'))
            {
                $data = $data->whereBetween('created_at', [$request->from_date, $request->to_date]);
            }

            return DataTables::of($data)->addIndexColumn()->make(true);
        }
        return view('users');
    }
}


Save the changes and make sure to import the necessary namespaces at the top of the file.


6 - Create Views Blade File


We now need to create a view file that will display the DataTables table and the date range filter inputs. Create a new file called users.blade.php in the resources/views/ directory. Add the following code to the file:


<!DOCTYPE html>
<html>
<head>
    <title>Laravel 10 Datatables Date Range Filter</title>
    <meta name="csrf-token" content="{{ csrf_token() }}" />
    <link href="https://cdnjs.cloudflare.com/ajax/libs/twitter-bootstrap/5.0.1/css/bootstrap.min.css" rel="stylesheet">
    <link href="https://cdn.datatables.net/1.11.4/css/dataTables.bootstrap5.min.css" rel="stylesheet">
    <script src="https://code.jquery.com/jquery-3.5.1.js"></script>  
    <script src="https://cdnjs.cloudflare.com/ajax/libs/jquery-validate/1.19.0/jquery.validate.js"></script>
    <script src="https://cdn.datatables.net/1.11.4/js/jquery.dataTables.min.js"></script>
    <script src="https://cdn.jsdelivr.net/npm/bootstrap@5.0.2/dist/js/bootstrap.bundle.min.js" integrity="sha384-MrcW6ZMFYlzcLA8Nl+NtUVF0sA7MsXsP1UyJoMp4YLEuNSfAP+JcXn/tWtIaxVXM" crossorigin="anonymous"></script>
    <script src="https://cdn.datatables.net/1.11.4/js/dataTables.bootstrap5.min.js"></script>
    <script src="https://use.fontawesome.com/releases/v6.1.0/js/all.js" crossorigin="anonymous"></script>
    <script type="text/javascript" src="https://cdn.jsdelivr.net/momentjs/latest/moment.min.js"></script>
    <script type="text/javascript" src="https://cdn.jsdelivr.net/npm/daterangepicker/daterangepicker.min.js"></script>
    <link rel="stylesheet" type="text/css" href="https://cdn.jsdelivr.net/npm/daterangepicker/daterangepicker.css" />
</head>
<body>
       
    <div class="container">
        <h1 class="text-center text-success mt-5 mb-5"><b>Laravel 10 Datatables Date Range Filter</b></h1>
        <div class="card">
            <div class="card-header">
                <div class="row">
                    <div class="col col-9"><b>Sample Data</b></div>
                    <div class="col col-3">
                        <div id="daterange"  class="float-end" style="background: #fff; cursor: pointer; padding: 5px 10px; border: 1px solid #ccc; width: 100%; text-align:center">
                            <i class="fa fa-calendar"></i>&nbsp;
                            <span></span> 
                            <i class="fa fa-caret-down"></i>
                        </div>
                    </div>
                </div>
            </div>
            <div class="card-body">
                <table class="table table-bordered" id="daterange_table">
                    <thead>
                        <tr>
                            <th>No</th>
                            <th>Name</th>
                            <th>Email</th>
                            <th>Created On</th>
                        </tr>
                    </thead>
                    <tbody>
                    </tbody>
                </table>
            </div>
        </div>
    </div>
</body>
<script type="text/javascript">

$(function () {

    var start_date = moment().subtract(1, 'M');

    var end_date = moment();

    $('#daterange span').html(start_date.format('MMMM D, YYYY') + ' - ' + end_date.format('MMMM D, YYYY'));

    $('#daterange').daterangepicker({
        startDate : start_date,
        endDate : end_date
    }, function(start_date, end_date){
        $('#daterange span').html(start_date.format('MMMM D, YYYY') + ' - ' + end_date.format('MMMM D, YYYY'));

        table.draw();
    });

    var table = $('#daterange_table').DataTable({
        processing : true,
        serverSide : true,
        ajax : {
            url : "{{ route('users.index') }}",
            data : function(data){
                data.from_date = $('#daterange').data('daterangepicker').startDate.format('YYYY-MM-DD');
                data.to_date = $('#daterange').data('daterangepicker').endDate.format('YYYY-MM-DD');
            }
        },
        columns : [
            {data : 'id', name : 'id'},
            {data : 'name', name : 'name'},
            {data : 'email', name : 'email'},
            {data : 'created_at', name : 'created_at'}
        ]
    });

});

</script>
</html>


Make sure to include the necessary JavaScript and CSS files for DataTables and the date range picker.

7 - Set Route


Next, we need to define a route that will handle the Ajax requests for filtering. Open the routes/web.php file and add the following code:


<?php

use Illuminate\Support\Facades\Route;

use App\Http\Controllers\UserController;

/*
|--------------------------------------------------------------------------
| Web Routes
|--------------------------------------------------------------------------
|
| Here is where you can register web routes for your application. These
| routes are loaded by the RouteServiceProvider and all of them will
| be assigned to the "web" middleware group. Make something great!
|
*/

Route::get('/', function () {
    return view('welcome');
});


Route::get('users', [UserController::class, 'index'])->name('users.index');


8 - Run Laravel App


Finally, run your Laravel application by executing the following command in your terminal:


php artisan serve


Visit the URL provided, which is usually http://localhost:8000/users, to see the application in action. You should see a table of users along with a date range input. Selecting a date range will dynamically filter the users based on the chosen range.

Congratulations! You have successfully implemented an Ajax-based date range filtering feature with Yajra DataTables in Laravel 10.

Remember to customize the styling and further enhance the functionality as per your project's requirements.

Please note that you may need to install the required JavaScript libraries and CSS frameworks mentioned in the article before using them in your application.

I hope this comprehensive guide helps you. If you have any further questions, feel free to ask!

Thursday, 6 April 2023

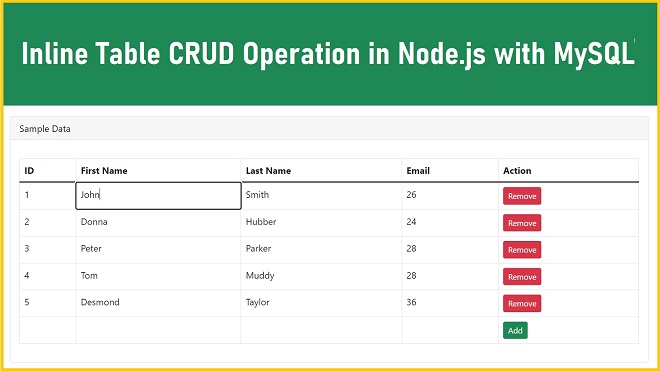
Live Table Insert Update Delete in Node.js with MySQL

Live Table Insert Update Delete in Node.js with MySQL

Live Table Add Edit Delete MySQL Data in Node.js" is a popular feature of web applications that allows users to manipulate data on a page without having to refresh the page. This feature can be implemented using Node.js and MySQL, and in this article, we will walk through a step-by-step guide on how to create a live table that can add, edit and delete data using Node.js and MySQL.

To get started, we need to create a Node.js project and install the required dependencies. We can do this by running the following commands:


mkdir live_table_insert_update_delete
cd live_table_insert_update_delete
npm init -y
npm install express mysql body-parser


The above commands will create a new directory called live_table_insert_update_delete, initialize a new Node.js project and install the required dependencies.

Next, we need to create a MySQL database and table that we will use to store our sample data. We can do this by running the following SQL commands:


CREATE DATABASE testing;

USE testing;

CREATE TABLE sample_data (
  id int(11) NOT NULL AUTO_INCREMENT,
  first_name varchar(255) NOT NULL,
  last_name varchar(255) NOT NULL,
  age int(11) NOT NULL,
  PRIMARY KEY (id)
);


The above commands will create a new database called testing and a table called sample_data with four columns: id, first_name, last_name, and age.

Now we have create a new file called server.js and add the following code:

server.js

//imports the Express framework
const express = require('express');

//import mysql module
const mysql = require('mysql');

//import body-parser module
const bodyParser = require('body-parser');

//creates an instance of the Express application
const app = express();

// Add middleware for parse incoming request body
app.use(bodyParser.urlencoded({ extended : false }));

// Add middleware for parse incoming data in JSON
app.use(bodyParser.json());

//Make MySQL Database Connection
const connection = mysql.createConnection({
	host : 'localhost',
	database : 'testing',
	user : 'root',
	password : ''
});

//Check MySQL Database Connection
connection.connect((error) => {
	console.log('MySQL Database is connected Successfully');
});

//Create Route for Load index.html file
app.get("/", (request, response) => {
	response.sendFile(__dirname + "/index.html");
});

//Crate Route handle get request
app.get("/get_data", (request, response) => {
	const sql = `SELECT * FROM sample_data ORDER BY id ASC`;

	connection.query(sql, (error, results) => {
		console.log(error);
		response.send(results);

	});
});

//Create Route for Insert Data Operation
app.post("/add_data", (request, response) => {

	const first_name = request.body.first_name;

	const last_name = request.body.last_name;

	const age = request.body.age;

	const sql = `
	INSERT INTO sample_data 
	(first_name, last_name, age) 
	VALUES ("${first_name}", "${last_name}", "${age}")
	`;

	connection.query(sql, (error, results) => {
		response.json({
			message : 'Data Added'
		});
	});

});

//Create Route for Update Data Operation
app.post('/update_data', (request, response) => {

	const variable_name = request.body.variable_name;

	const variable_value = request.body.variable_value;

	const id = request.body.id;

	const sql = `UPDATE sample_data SET `+variable_name+`= "${variable_value}" WHERE id = "${id}"`;

	connection.query(sql, (error, results) => {

		response.json({
			message : 'Data Updated'
		});

	});

});

//Create Route for Delete data operation
app.post("/delete_data", (request, response) => {

	const id = request.body.id;

	const sql = `DELETE FROM sample_data WHERE id = '${id}'`;

	connection.query(sql, (error, results) => {
		response.json({
			message : 'Data Deleted'
		});
	});

});

app.listen(3000, () => {
	console.log('Server listening on port 3000');
});


This is a Node.js server-side code that creates a web application using the Express framework, and connects to a MySQL database to perform CRUD (Create, Read, Update, and Delete) operations. Here is a brief description of the code:

  1. Import the required modules: Express, MySQL, and body-parser.
  2. Create an instance of the Express application.
  3. Add middleware for parsing incoming request body, including JSON data.
  4. Create a MySQL database connection and check if it is connected successfully.
  5. Create a route to serve the index.html file.
  6. Create a route to handle GET requests and retrieve data from the MySQL database.
  7. Create a route to handle POST requests and insert data into the MySQL database.
  8. Create a route to handle POST requests and update data in the MySQL database.
  9. Create a route to handle POST requests and delete data in the MySQL database.
  10. Listen to the server on port 3000.

Overall, this code provides the backend functionality to serve a web application and perform CRUD operations on a MySQL database.


After this, we have to create index.html file for write HTML code and Vanilla JavaScript code.

index.html

<!DOCTYPE html>
<html>
<head>
    <meta charset="utf-8">
    <title>Live Table Insert Update Delete in Node.js with MySQL</title>
    <link href="https://getbootstrap.com/docs/5.1/dist/css/bootstrap.min.css" rel="stylesheet" integrity="sha384-1BmE4kWBq78iYhFldvKuhfTAU6auU8tT94WrHftjDbrCEXSU1oBoqyl2QvZ6jIW3" crossorigin="anonymous">
</head>
<body>
    <div class="container mt-5 mb-5">
        <h1 class="text-danger text-center"><b>Inline Table CRUD Operation in Node.js with MySQL - Delete Data</b></h1>
        <div class="mt-3 mb-3">
            <div class="card">
                <div class="card-header">Sample Data</div>
                <div class="card-body">
                    <table class="table table-bordered mt-3">
                        <thead>
                            <tr>
                                <th>ID</th>
                                <th>First Name</th>
                                <th>Last Name</th>
                                <th>Age</th>
                                <th>Action</th>
                            </tr>
                        </thead>
                        <tbody id="results">

                        </tbody>
                    </table>
                </div>
            </div>
        </div>
    </div>
</body>
</html>

<script>

    const results_body = document.querySelector('#results');

    load_data();

    function load_data()
    {
        const request = new XMLHttpRequest();

        request.open(`get`, `/get_data`);

        let html = '';

        request.onreadystatechange = () => {
            if(request.readyState === XMLHttpRequest.DONE && request.status === 200)
            {
                const results = JSON.parse(request.responseText);

                results.forEach(result => {
                    html += `
                    <tr>
                        <td>`+result.id+`</td>
                        <td contenteditable onblur="update_data(this, 'first_name', '`+result.id+`')">`+result.first_name+`</td>
                        <td contenteditable onblur="update_data(this, 'last_name', '`+result.id+`')">`+result.last_name+`</td>
                        <td contenteditable onblur="update_data(this, 'age', '`+result.id+`')">`+result.age+`</td>
                        <td><button type="button" class="btn btn-danger btn-sm" onclick="delete_data(`+result.id+`)">Remove</button></td>
                    </tr>
                    `;
                });

                html += `
                <tr>
                    <td></td>
                    <td contenteditable id="first_name_data"></td>
                    <td contenteditable id="last_name_data"></td>
                    <td contenteditable id="age_data"></td>
                    <td><button type="button" class="btn btn-success btn-sm" onclick="add_data()">Add</button></td>
                </tr>
                `;

                results_body.innerHTML = html;
            }
        };

        request.send();
    }

    function add_data()
    {
        const first_name = document.getElementById('first_name_data');

        const last_name = document.getElementById('last_name_data');

        const age = document.getElementById('age_data');

        const param = `first_name=`+first_name.innerText+`&last_name=`+last_name.innerText+`&age=`+age.innerText+``;

        const request = new XMLHttpRequest();

        request.open(`POST`, `/add_data`, true);

        request.setRequestHeader("Content-Type", "application/x-www-form-urlencoded");

        request.onreadystatechange = () => {

            if(request.readyState === XMLHttpRequest.DONE && request.status === 200)
            {
                alert("Data Added");

                load_data();
            }

        };

        request.send(param);
    }

    function update_data(element, variable_name, id)
    {
        const param = `variable_name=`+variable_name+`&variable_value=`+element.innerText+`&id=`+id+``;

        const request = new XMLHttpRequest();

        request.open(`POST`, `/update_data`, true);

        //Send the proper header information along with the request
        request.setRequestHeader('Content-Type', 'application/x-www-form-urlencoded');

        request.onreadystatechange = () => {

            if(request.readyState === XMLHttpRequest.DONE && request.status === 200)
            {

                alert('Data Updated');

            }

        };

        request.send(param);
    }

    function delete_data(id)
    {
        if(confirm("Are you sure you want to remove it?"))
        {
            const param = `id=`+id+``;

            const request = new XMLHttpRequest();

            request.open('POST', `/delete_data`, true);

            request.setRequestHeader('Content-Type', 'application/x-www-form-urlencoded');

            request.onreadystatechange = () => {

                if(request.readyState === XMLHttpRequest.DONE && request.status === 200)
                {
                    alert('Data Deleted');

                    load_data();
                }

            };

            request.send(param);
        }
    }

</script>


This code is a web page with a table that performs CRUD (Create, Read, Update, Delete) operations in Node.js with MySQL. The table is displayed in a Bootstrap card, and it shows a list of people with their IDs, first and last names, email, and gender. The table can be edited inline, and it has an "Add" button that adds a new row to the table, a "Remove" button that deletes a row from the table, and an "Update" button that updates the data in the table.

The JavaScript code uses XMLHttpRequest to send asynchronous HTTP requests to the server-side Node.js application, which interacts with a MySQL database to perform the CRUD operations. The load_data() function sends a GET request to the server-side application to retrieve the data and displays it in the table using HTML. The add_data(), update_data() and delete_data() functions send POST requests to the server-side application to perform the corresponding operations.

In conclusion, the Live Table Add Edit Delete MySQL Data in Node.js is a web application that allows users to perform basic CRUD (Create, Read, Update, and Delete) operations on a MySQL database using Node.js. The application uses an HTML table to display the data from the database, which can be edited, updated, and deleted in real-time. The code uses AJAX requests to communicate with the server-side Node.js application, which handles the database operations. This application can be useful for developers who want to learn how to build a basic CRUD application using Node.js and MySQL or for those who need a simple way to manage data stored in a MySQL database.

Thursday, 30 March 2023

How to Make Shopping Cart in Node.js Express & MySQL


Introduction


In this tutorial, we will learn how to create a simple shopping cart in Node.js with session storage. We will create a simple e-commerce application that will allow users to add items to their cart and view their cart. The shopping cart will be implemented using session storage to store the cart data.

Prerequisites:


  • Node.js installed on your machine.
  • Basic knowledge of Node.js and Express.js.

How to Make Shopping Cart in Node.js Express & MySQL

Step 1: Set up the project and install dependencies


Create a new directory for your project and navigate to that directory using the command prompt. Once you are inside the directory, initialize the Node.js project by running the following command:


npm init


This will create a package.json file in your project directory. Next, we need to install the required dependencies for our project. We will be using the following dependencies:

  • Express.js: A Node.js web application framework.
  • body-parser: A Node.js middleware for handling HTTP request body parsing.
  • express-session: A Node.js middleware for handling user sessions.
  • mysql: A Node.js driver for MySQL database.

Install the dependencies using the following command:


npm install express body-parser express-session mysql


Step 2: Create the product table


Create a new table named product in your MySQL database using the following SQL script:


--
-- Database: `testing`
--

-- --------------------------------------------------------

--
-- Table structure for table `product`
--

CREATE TABLE `product` (
  `product_id` int(20) NOT NULL,
  `product_name` varchar(120) NOT NULL,
  `product_brand` varchar(100) NOT NULL,
  `product_price` decimal(8,2) NOT NULL,
  `product_ram` char(5) NOT NULL,
  `product_storage` varchar(50) NOT NULL,
  `product_camera` varchar(20) NOT NULL,
  `product_image` varchar(100) NOT NULL,
  `product_quantity` mediumint(5) NOT NULL,
  `product_status` enum('0','1') NOT NULL COMMENT '0-active,1-inactive'
) ENGINE=MyISAM DEFAULT CHARSET=utf8;

--
-- Indexes for table `product`
--
ALTER TABLE `product`
  ADD PRIMARY KEY (`product_id`);

--
-- AUTO_INCREMENT for dumped tables
--

--
-- AUTO_INCREMENT for table `product`
--
ALTER TABLE `product`
  MODIFY `product_id` int(20) NOT NULL AUTO_INCREMENT;


Insert some sample data into the product table using the following SQL script:


--
-- Dumping data for table `product`
--

INSERT INTO `product` (`product_id`, `product_name`, `product_brand`, `product_price`, `product_ram`, `product_storage`, `product_camera`, `product_image`, `product_quantity`, `product_status`) VALUES
(1, 'Honor 9 Lite (Sapphire Blue, 64 GB)  (4 GB RAM)', 'Honor', '14499.00', '4', '64', '13', 'image-1.jpeg', 10, '1'),
(2, '\r\nInfinix Hot S3 (Sandstone Black, 32 GB)  (3 GB RAM)', 'Infinix', '8999.00', '3', '32', '13', 'image-2.jpeg', 10, '1'),
(3, 'VIVO V9 Youth (Gold, 32 GB)  (4 GB RAM)', 'VIVO', '16990.00', '4', '32', '16', 'image-3.jpeg', 10, '1'),
(4, 'Moto E4 Plus (Fine Gold, 32 GB)  (3 GB RAM)', 'Moto', '11499.00', '3', '32', '8', 'image-4.jpeg', 10, '1'),
(5, 'Lenovo K8 Plus (Venom Black, 32 GB)  (3 GB RAM)', 'Lenevo', '9999.00', '3', '32', '13', 'image-5.jpg', 10, '1'),
(6, 'Samsung Galaxy On Nxt (Gold, 16 GB)  (3 GB RAM)', 'Samsung', '10990.00', '3', '16', '13', 'image-6.jpeg', 10, '1'),
(7, 'Moto C Plus (Pearl White, 16 GB)  (2 GB RAM)', 'Moto', '7799.00', '2', '16', '8', 'image-7.jpeg', 10, '1'),
(8, 'Panasonic P77 (White, 16 GB)  (1 GB RAM)', 'Panasonic', '5999.00', '1', '16', '8', 'image-8.jpeg', 10, '1'),
(9, 'OPPO F5 (Black, 64 GB)  (6 GB RAM)', 'OPPO', '19990.00', '6', '64', '16', 'image-9.jpeg', 10, '1'),
(10, 'Honor 7A (Gold, 32 GB)  (3 GB RAM)', 'Honor', '8999.00', '3', '32', '13', 'image-10.jpeg', 10, '1'),
(11, 'Asus ZenFone 5Z (Midnight Blue, 64 GB)  (6 GB RAM)', 'Asus', '29999.00', '6', '128', '12', 'image-12.jpeg', 10, '1'),
(12, 'Redmi 5A (Gold, 32 GB)  (3 GB RAM)', 'MI', '5999.00', '3', '32', '13', 'image-12.jpeg', 10, '1'),
(13, 'Intex Indie 5 (Black, 16 GB)  (2 GB RAM)', 'Intex', '4999.00', '2', '16', '8', 'image-13.jpeg', 10, '1'),
(14, 'Google Pixel 2 XL (18:9 Display, 64 GB) White', 'Google', '61990.00', '4', '64', '12', 'image-14.jpeg', 10, '1'),
(15, 'Samsung Galaxy A9', 'Samsung', '36000.00', '8', '128', '24', 'image-15.jpeg', 10, '1'),
(16, 'Lenovo A5', 'Lenovo', '5999.00', '2', '16', '13', 'image-16.jpeg', 10, '1'),
(17, 'Asus Zenfone Lite L1', 'Asus', '5999.00', '2', '16', '13', 'image-17.jpeg', 10, '1'),
(18, 'Lenovo K9', 'Lenovo', '8999.00', '3', '32', '13', 'image-18.jpeg', 10, '1'),
(19, 'Infinix Hot S3x', 'Infinix', '9999.00', '3', '32', '13', 'image-19.jpeg', 10, '1'),
(20, 'Realme 2', 'Realme', '8990.00', '4', '64', '13', 'image-20.jpeg', 10, '1'),
(21, 'Redmi Note 6 Pro', 'Redmi', '13999.00', '4', '64', '20', 'image-21.jpeg', 10, '1'),
(22, 'Realme C1', 'Realme', '7999.00', '2', '16', '15', 'image-22.jpeg', 10, '1'),
(23, 'Vivo V11', 'Vivo', '22900.00', '6', '64', '21', 'image-23.jpeg', 10, '1'),
(24, 'Oppo F9 Pro', 'Oppo', '23990.00', '6', '64', '18', 'image-24.jpg', 10, '1'),
(25, 'Honor 9N', 'Honor', '11999.00', '4', '64', '15', 'image-25.jpg', 10, '1'),
(26, 'Redmi 6A', 'Redmi', '6599.00', '2', '16', '13', 'image-26.jpeg', 10, '1'),
(27, 'InFocus Vision 3', 'InFocus', '7399.00', '2', '16', '13', 'image-27.jpeg', 10, '1'),
(28, 'Vivo Y69', 'Vivo', '11390.00', '3', '32', '16', 'image-28.jpeg', 10, '1'),
(29, 'Honor 7x', 'Honor', '12721.00', '4', '32', '18', 'image-29.jpeg', 10, '1'),
(30, 'Nokia 2.1', 'Nokia', '6580.00', '2', '1', '8', 'image-30.jpeg', 10, '1');


Step 3: Create the server.js file


Create a new file named server.js in your project directory and add the following code:

server.js

const express = require('express');

const mysql = require('mysql');

const body_parser = require('body-parser');

const session = require('express-session');

const app = express();

app.use(body_parser.urlencoded({ extended : false }));

app.use(body_parser.json());

//middleware for serving static file
app.use(express.static('public'));

//Set up EJS as template engine
app.set('view engine', 'ejs');

//Make MySQL Database Connection
const connection = mysql.createConnection({
	host : 'localhost',
	database : 'testing',
	user : 'root',
	password : ''
});

//Check MySQL Database Connection
connection.connect((error) => {
	console.log('MySQL Database is connected Successfully');
});

//Set up Session Middleware
app.use(session({
	secret : '1234567890abcdefghijklmnopqrstuvwxyz',
	resave : false,
	saveUninitialized : true,
	cookie : { secure : false }
}));

//Create Route for Load Product Data
app.get("/", (request, response) => {

	const query = `SELECT * FROM product LIMIT 3`;

	//Execute Query
	connection.query(query, (error, result) => {

		if(!request.session.cart)
		{
			request.session.cart = [];
		}

		response.render('product', { products : result, cart : request.session.cart });

	});

});

//Create Route for Add Item into Cart
app.post('/add_cart', (request, response) => {

	const product_id = request.body.product_id;

	const product_name = request.body.product_name;

	const product_price = request.body.product_price;

	let count = 0;

	for(let i = 0; i < request.session.cart.length; i++)
	{

		if(request.session.cart[i].product_id === product_id)
		{
			request.session.cart[i].quantity += 1;

			count++;
		}

	}

	if(count === 0)
	{
		const cart_data = {
			product_id : product_id,
			product_name : product_name,
			product_price : parseFloat(product_price),
			quantity : 1
		};

		request.session.cart.push(cart_data);
	}

	response.redirect("/");

});

//Create Route for Remove Item from Shopping Cart
app.get('/remove_item', (request, response) => {

	const product_id = request.query.id;

	for(let i = 0; i < request.session.cart.length; i++)
	{
		if(request.session.cart[i].product_id === product_id)
		{
			request.session.cart.splice(i, 1);
		}
	}

	response.redirect("/");

});

app.listen(3000, () => {

	console.log('Server has started on port number 3000');

});


Under this file first we have import require Node module and then after we have set up require middleware for Node.js Shopping cart application.

Under this Node.js Shopping cart we have use Session for store shopping cart data in Session, so when page has been refresh then shopping cart data will be removed from this Node Application. So here in this file we have also set up Session middleware for store Shopping cart data.

After this we have make MySQL database connection and then after we have test that our Node.js shopping cart application has been connection with MySQL database.

Under this file we have create three route for handle shopping cart action.

First is the "/" route when has been use get() method and under this route we have fetch data from product table and send that data to product view file. Under this route we have also create cart session variable if it is not created.

Second route is "/add_cart" which has been use post() method. This route has receive data from Add to cart form. So when we have add item into cart by click on Add to cart button then this route will receive Item data which has been store in shopping cart. But suppose particular item data already exists in cart session variable then it will increase that product quantity by 1. And lastly it will redirect web page to display list of product with shopping cart data.

And last route is "/remove_item" which has been use get() method and this route is receive query for remove item from shopping cart. So under this route it has receive item id in url and based on that id value it will remove that id item from shopping cart and it will redirect web page to display all product with remaning shopping cart data on web page.

Step 4: Create Views File


In Node Express framework we have use EJS template for display HTML output in the browser. So in Node Express framework we have to create views directory under our Node Application and under that directory we have to create product.ejs file and under this file we have to write following code.

views/product.ejs

<!DOCTYPE html>
<html>
<head>
    <meta charset="utf-8">
    <title>Node.js Tutorial - Simple Shopping Cart</title>
    <link href="https://getbootstrap.com/docs/5.1/dist/css/bootstrap.min.css" rel="stylesheet" integrity="sha384-1BmE4kWBq78iYhFldvKuhfTAU6auU8tT94WrHftjDbrCEXSU1oBoqyl2QvZ6jIW3" crossorigin="anonymous">
</head>
<body>
    <div class="container-fluid mt-5 mb-5">
        <h1 class="text-center"><b>Node.js Tutorial - Simple Shopping Cart</b></h1>
        <div class="mt-3 mb-3">
            <div class="row">
                <div class="col-md-8">
                    <div class="card">
                        <div class="card-header"><b>Product List</b></div>
                        <div class="card-body">
                            <div class="row">
                                <% products.forEach(product => { %>
                                <div class="col-md-4 mb-5 text-center">
                                    <img src="/images/<%= product.product_image %>" class="img-thumbnail mb-3" />
                                    <h4><b><%= product.product_name %></b></h4>
                                    <h3 class="text-danger"><%= product.product_price %></h3>
                                    <form method="post" action="/add_cart">
                                        <input type="hidden" name="product_id" value="<%= product.product_id %>" />

                                        <input type="hidden" name="product_name" value="<%= product.product_name %>" />

                                        <input type="hidden" name="product_price" value="<%= product.product_price %>" />

                                        <input type="submit" class="btn btn-warning" value="Add to Cart" />
                                    </form>
                                </div>
                                <% }) %>
                            </div>
                        </div>
                    </div>
                </div>
                <div class="col-md-4">
                    <div class="card">
                        <div class="card-header"><b>Shopping Cart</b></div>
                        <div class="card-body">
                            <table class="table">
                                <tr>
                                    <th>Item Name</th>
                                    <th>Quantity</th>
                                    <th>Unit Price</th>
                                    <th>Total Price</th>
                                    <th>Remove</th>
                                </tr>
                                <% 
                                if(cart.length > 0)
                                {
                                    let total = 0;

                                    cart.forEach(item => {
                                %>
                                <tr>
                                    <td><%= item.product_name %></td>
                                    <td><%= item.quantity %></td>
                                    <td><%= item.product_price %></td>
                                    <td><%= parseFloat(item.quantity) * parseFloat(item.product_price) %></td>
                                    <td><button type="button" class="btn btn-danger btn-sm" onclick="remove_item(<%= item.product_id %>)">Remove</button></td>
                                </tr>
                                <%
                                        total += parseFloat(item.quantity) * parseFloat(item.product_price);
                                    })
                                %>
                                <tr>
                                    <td colspan="3" aling="right"><b>Total</b></td>
                                    <td><%= total %></td>
                                    <td>&nbsp;</td>
                                </tr>
                                <%
                                }
                                else
                                {
                                %>

                                <tr>
                                    <td colspan="5" align="center">No Item Found in Cart</td>
                                </tr>

                                <%
                                }
                                %>
                            </table>
                        </div>
                    </div>
                </div>
            </div>
            <br />
            
        </div>
    </div>
</body>
</html>

<script>

    function remove_item(item_id)
    {
        if(confirm("Are you sure you want to remove it?"))
        {
            window.location.href = `/remove_item?id=${item_id}`;
        }
    }

</script>


This code is the view template for the product page. The page displays a list of products with their respective images, names, and prices. For each product, there is a form to add the product to the shopping cart. The shopping cart is also displayed on the same page on the right side of the screen. The shopping cart shows the list of items added to the cart with their respective quantities, unit prices, and total prices.

The shopping cart also provides a remove button to remove an item from the cart. The function remove_item is defined in the script tag that removes the item from the cart by sending a request to the server with the item's ID.

The page is designed using Bootstrap 5 CSS classes, with a container-fluid and a row for the main content, and two columns for the product list and the shopping cart, respectively. The product list is created using a loop that iterates over each product in the products array and displays their information using EJS syntax. The shopping cart is also created using a loop that iterates over each item in the cart array and displays their information. If the cart is empty, the page shows a message indicating that no items have been added to the cart.

Conclusion


Overall, creating a shopping cart in Node.js is a relatively easy task, and with the help of this tutorial, you can create a shopping cart for your Node.js application.