Storing of Images into Mysql Database and then after fetch images from Mysql database in Laravel framework is one task for any web developer. And in this post, we are going to learn how to store image and retrieve images from MySql database, we will learn this things in Laravel 6 framework. Because this is latest version of Laravel framework, and every learner want to learn any topic in latest version. So In Laravel 6 framework, how to insert images in Mysql database, and then after how to fetch images from Mysql database and display on web page.
In this post, we have step by step describe the process of insert images in Mysql table in Laravel 6 framework. Now in your mind one question has been arise, why we have to store images in database. This is because we can store images in folder, so why we have to store images in database and why we have increase the size of our database. But there is also some advantage of storing or inserting images into database also. There is one important advantage is that when we have take the back up of our database, then at the time all our images or file backup has been also take place and we do not want to take back up of images separately.
There is other benefits of store images in database is that all images has been store in binary form, and it will be visible on web page only. So, here our images has been secured because it is store in binary form not in it's original form. So there are many other benefits of storing images in database. Here in this post we have not discuss benefits of storing images in database, but here we want to discuss what is the process of store and retrieve images from Mysql database in Laravel 6 framework.
- Install Laravel 6 framework
- Make Database Connection
- Create Model Class
- Download Image Intervention Library
- Create Controller Class
- Create View Blade File
- Set Route
- Run Laravel Application
Install Laravel 6 framework
If you want to use Laravel for you web application development. For this first we want to download Laravel latest version. For this you have to go command prompt and go to directory in which you want to download and Install Laravel framework and run following command.
composer create-project --prefer-dist laravel/laravel laravel6
This command will make laravel6 folder and in that folder it will download latest version of Laravel framework.
Make Database Connection
For make database connection in Laravel 6 framework, we have to open .env file. In this file we have to define Mysql database configuration details, which you can find below.
DB_CONNECTION=mysql
DB_HOST=localhost
DB_PORT=3306
DB_DATABASE=testing
DB_USERNAME=root
DB_PASSWORD=
Create Model Class
For store and retrieve image from Mysql database, here we will use Laravel Model class for database related operation. So, first we want to make Model class, for this we have to go command prompt and run following command.
php artisan make:model Images -m
This command will make Images.php model class in app directory and also make table migrations file in database/migrations folder. First we have to open migration file which you can find database/migrations folder and in that you to define table column defination which you can find below.
<?php

use Illuminate\Database\Migrations\Migration;
use Illuminate\Database\Schema\Blueprint;
use Illuminate\Support\Facades\Schema;

class CreateImagesTable extends Migration
{
    /**
     * Run the migrations.
     *
     * @return void
     */
    public function up()
    {
        Schema::create('images', function (Blueprint $table) {
            $table->bigIncrements('id');
            $table->string('user_name');
            $table->binary('user_image');
            $table->timestamps();
        });
    }

    /**
     * Reverse the migrations.
     *
     * @return void
     */
    public function down()
    {
        Schema::dropIfExists('images');
    }
}
Here we have add two table column like user_name and user_image. Now we want to create table in mysql database. For this also we have to go command prompt and run following command.
php artisan migrate
This command will make images table in Mysql database. Now we open app/Images.php model class. In this class we have to define in which table column data, will be fill be user, we have to define in model class, which you can find below.
<?php

namespace App;

use Illuminate\Database\Eloquent\Model;

class Images extends Model
{
    protected $fillable = ['user_name', 'user_image'];
}
Download Image Intervention Library
Here we have use Image Intervention library for Image manipulation. This library is open source PHP image library for handling and manipulation of Image, this library has also provide feature like create, edit and compose image. First we want to download this library, for this we have to run following command.
composer require intervention/image
This command will download this image intervention library, here we have use extra package in Laravel framework, so we have to tell laravel for this new package. For this we have to open config/app.php and define new package details.
'providers' => [

    // ...
      Intervention\Image\ImageServiceProvider::class,
    // ...
  ],
'aliases' => [
    // ...
      'Image'     => Intervention\Image\Facades\Image::class,
    // ...
  ],
So, this way we can use extra package in Laravel fraework.
Create Controller Class
In Laravel framework for handle http request, we have to create controller class. For create controller class file we have to go command prompt and run following command.
php artisan make:controller StoreImageController
This command will make StoreImageController.php controller file under app/Http/Controllers folder. In this controller class, first we have to import following class in header of this class.
use Illuminate\Support\Facades\Response;
use App\Images;
use Image;
After this in controller class we have make following method.
index() - This is the root method of this class, It will fetch data from images folder and display on store_image.blade.php file.
insert_image(Request $request) - When form has been submitted, then this method has received form data for insert data into Mysql database. In this method first it validate that data follow validation rules or not. If it follow validation rules then it has process for insert into mysql table. Here for before store image into Mysql database, first it has been converted into binary form and then after store into Mysql database.
fetch_image($image_id) - This method has first fetch single user data based on value of primary key, and from that data first it has fetch image and then after converted into binary and return image as an output of this method.
<?php

namespace App\Http\Controllers;

use Illuminate\Http\Request;
use App\Images;
use Illuminate\Support\Facades\Response;
use Image;

class StoreImageController extends Controller
{
    function index()
    {
     $data = Images::latest()->paginate(5);
     return view('store_image', compact('data'))
       ->with('i', (request()->input('page', 1) - 1) * 5);
    }

    function insert_image(Request $request)
    {
     $request->validate([
      'user_name'  => 'required',
      'user_image' => 'required|image|max:2048'
     ]);

     $image_file = $request->user_image;

     $image = Image::make($image_file);

     Response::make($image->encode('jpeg'));

     $form_data = array(
      'user_name'  => $request->user_name,
      'user_image' => $image
     );

     Images::create($form_data);

     return redirect()->back()->with('success', 'Image store in database successfully');
    }

    function fetch_image($image_id)
    {
     $image = Images::findOrFail($image_id);

     $image_file = Image::make($image->user_image);

     $response = Response::make($image_file->encode('jpeg'));

     $response->header('Content-Type', 'image/jpeg');

     return $response;
    }
}
Create View Blade File
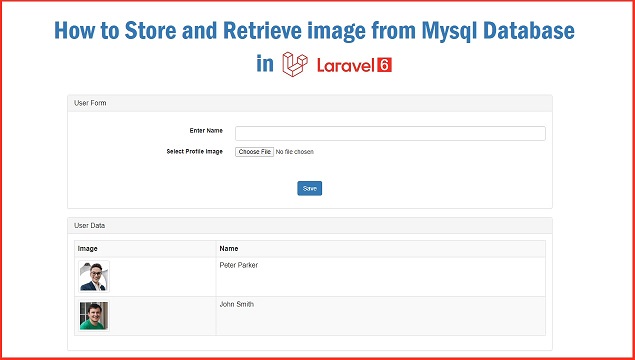
In Laravel framework for display html output on web page, here it has use blade file which has been store under resources/views folder. Here in this views file, we have done following things.
- Write code for display form data validation error
- Write code for display success message
- Make HTML form for enter name and select profile image
- Make HTML table for display dynamic data on web page
resources/views/store_image.blade.php
<html>
<head>
 <meta name="viewport" content="width=device-width, initial-scale=1">
 <title>Insert Image into Mysql Database in Laravel 6</title>
 <script src="https://ajax.googleapis.com/ajax/libs/jquery/2.2.0/jquery.min.js"></script>
 <link rel="stylesheet" href="https://maxcdn.bootstrapcdn.com/bootstrap/3.3.6/css/bootstrap.min.css" />
 <script src="https://maxcdn.bootstrapcdn.com/bootstrap/3.3.6/js/bootstrap.min.js"></script>
</head>
<body>
 <div class="container">
  <br />
  <h3 align="center">Insert Image into Mysql Database in Laravel 6</h3>
    <br />
    @if($errors->any())
    <div class="alert alert-danger">
           <ul>
           @foreach($errors->all() as $error)
            <li>{{ $error }}</li>
           @endforeach
           </ul>
        </div>
    @endif

    @if(session()->has('success'))
     <div class="alert alert-success">
     {{ session()->get('success') }}
     </div>
    @endif
    <br />

    <div class="panel panel-default">
         <div class="panel-heading">
             <h3 class="panel-title">User Form</h3>
         </div>
         <div class="panel-body">
         <br />
         <form method="post" action="{{ url('store_image/insert_image') }}"  enctype="multipart/form-data">
          @csrf
          <div class="form-group">
          <div class="row">
           <label class="col-md-4" align="right">Enter Name</label>
           <div class="col-md-8">
            <input type="text" name="user_name" class="form-control" />
           </div>
          </div>
         </div>
         <div class="form-group">
          <div class="row">
           <label class="col-md-4" align="right">Select Profile Image</label>
           <div class="col-md-8">
            <input type="file" name="user_image" />
           </div>
          </div>
         </div>
         <div class="form-group" align="center">
          <br />
          <br />
          <input type="submit" name="store_image" class="btn btn-primary" value="Save" />
         </div>
         </form>
      </div>
     </div>
     <div class="panel panel-default">
         <div class="panel-heading">
             <h3 class="panel-title">User Data</h3>
         </div>
         <div class="panel-body">
         <div class="table-responsive">
                <table class="table table-bordered table-striped">
                  <tr>
                     <th width="30%">Image</th>
                     <th width="70%">Name</th>
                  </tr>
                  @foreach($data as $row)
                  <tr>
                   <td>
                    <img src="store_image/fetch_image/{{ $row->id }}"  class="img-thumbnail" width="75" />
                   </td>
                   <td>{{ $row->user_name }}</td>
                  </tr>
                  @endforeach
              </table>
              {!! $data->links() !!}
             </div>
         </div>
     </div>
    </div>
 </body>
</html>
Set Route
Before run Laravel application, first we have to set the route of Laravel controller class method. For this we have to open routes/web.php file and set the route of controller method.
Route::get('store_image', 'StoreImageController@index');

Route::post('store_image/insert_image', 'StoreImageController@insert_image');

Route::get('store_image/fetch_image/{id}', 'StoreImageController@fetch_image');
Here we have set the route of all controller class method.
Run Laravel Application
If our code is ready, now we need to check in browser. For this we have to start laravel server, for this we have to go command prompt and run following command.
php artisan serve
This command will start Laravel server and give us base url of our Laravel application. For check above code we have to write following url in browser.
http://127.0.0.1:8000/store_image
So, this is complete step by step process for how to insert images into mysql database in Laravel 6 framework and how to fetch images from mysql table and display on web page in Laravel 6 application. If you want to get source code of this tutorial in zip, you can feel free to email us at webslesson@gmail.com, we will reply you with attach source code zip file.
Please send me the source code (zipped) of this
ReplyDeleteMail id : vineethb50@gmail.com
i am trying to do this but i get error whenever i upload an image
ReplyDeleteThanks.
ReplyDeleteI used FUNCTION code, but the images are not uploaded to the browser
ReplyDeleteC:\xampp\htdocs\StoreImages\vendor\laravel\framework\src\Illuminate\Database\Connection.php:669
Here only one time we are able to store the image, next time it shows the error.
ReplyDeletehey
ReplyDeleteerror : Class 'App\Images' not found
ReplyDeleteApp\models\Images
DeleteGuys it works, the only problem is with table. Just open MySQL workbench and change column from BLOB to LONGBLOB. Also don't forget about php.ini file size. Change from 2M to let's say 20MB. My insert_image method:
ReplyDeletefunction insert_image(Request $request)
{
$request->validate([
'user_name' => 'required'
]);
$image_file = $request->user_image;
$image_resize = Image::make($image_file)->encode('jpg');
$form_data = (array(
'user_name' => 'Konrad',
'user_image' => $image_resize
));
Images::create($form_data);
return redirect()->back()->with('success', 'Image store in database successfully');
}
Thank you so much, in my case for the error Connection.php was changing the blob to longblob in the db.
DeleteThank you very much it helped me a lot
DeleteImage source not readable
ReplyDeletel also of recent encountered it and l went on and realized that the form name doesn't match the name in the database. ensure that they are the same.
Deletetry changing $image_file = $request->user_image; to $image_file = $request->file('user_image'); . This solved my problem
Deletewhat the fuck is this man i got the error
ReplyDeleteIlluminate\Database\QueryException
the same with me. Have any one sovled this?
DeleteJust change "BLOB" to "LONGBLOB" in your database, worked for me.
Deletebefore converting your image to blob resize it.
Delete$image->resize(600, 600, function ($constraint) {
$constraint->aspectRatio();
});
this can apply to posgresql ???
ReplyDeleteIlluminate\Database\QueryException
ReplyDeletehttp://localhost/tutorial/paceTech/public/store_image/insert_image
thank you very much
ReplyDeletejpg image uploaded,but png images doesn't upload through the queryexception error,how to solve this?
ReplyDelete